Wedding DIY-Part I: Centerpieces
This is the first of a couple posts that I hope to share about some crafty things I (and some very selfless bridesmaids and family) made. I decided to DIY some of our wedding decorations because I had some ideas that would save Kevin and I a lot of money. As we were essentially planning a wedding on my income as Kevin was in school, frugality was a must. While the wedding party, my family, and I did make a lot of the decorations and we arranged our own flowers (with the expertise of one of my bridesmaids), we didn’t have to decorate much because the space was so beautiful. We did, however make our own centerpieces that turned out to be a beautiful accent to the space.

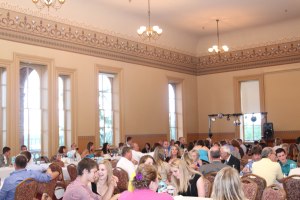
See how beautiful? High walls, grand windows, beautiful ceiling. I have to admit that the venue was one of our splurges.
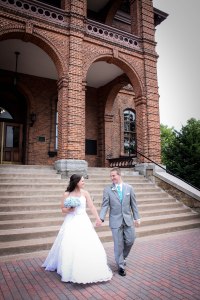
And the outside was just as beautiful.
Anyways, that was our reason for minimal decoration. What we did decorate was almost all DIY. One of my main focuses was table centerpieces. I scoured Pinterest and finally decided in the interest of saving money to do flowerless centerpieces.
Here’s how they turned out.

Here’s how we made them. I found a few steals at the Dollar Tree. I bought: -10 9” cylinder vases @ $1.00 each -10 7 1/4” cylinder vases @ $1.00 each -10 4″ rocks glass candleholders @ $1.00 each -40 4″ glass taper candleholders @ $1.00 each The rest I bought from Michael’s or elsewhere. I bought: -3 tubes of E6000 glass glue @ about $3.00 each -2 spools of thick blue ribbon @ about 3.00 each -2 spools of thin purple ribbon @ about $2.00 each -About 6 yards of grey lace (ordered on Etsy) @ about $12.00 -2 boxes of floating candles (ordered from Ikea) @ $6.00 each Total (estimated) cost: $113 Unfortunately, I do not have pictures of the process. Had I known I was going to start a blog, I would have taken a picture of each step. Here was our process. We started by gluing the glass candlestick holders to the vases and the tumblers to form the structure of the centerpiece. We put a ring of E6000 on the candlestick holders and centered that on the bottom of the vases and tumblers. While these dried, we worked on another wedding project. The directions say the glue will begin setting in about 10 minutes, but will take between 24 and 72 hours to fully cure. We didn’t have that long, so we ended up waiting about an hour and the candlestick holders seemed pretty secure at that point. Once they were reasonably dry, we began to wrap them with ribbon and lace. For the ribbon, we put a small dab of glass glue on the bottom and held the ribbon there for about a minute to begin to dry. We then wrapped the ribbon around, overlapping itself at parts. To finish, we met the two ends and trimmed the extra. It was largely similar with the lace, but we did not overlap. Voila! And with a little water and some floating candles, they made beautiful centerpieces. They weren’t lit right away because of lighter malfunction, but hey, it was my wedding…Nothing was going to spoil my day!
The only caution that I would give is to be careful of the ends and puckering. I found two solutions: wrap it a little tighter or cut a slit in the ribbon and glue down both sides of the slit.
Beautiful and affordable.
To see more DIY wedding projects, check out my place cards and place card holder and my Washi Tape coasters.
Happy crafting!


 Next Post